|
<< Click to Display Table of Contents >> Built-in Data |
  
|
|
<< Click to Display Table of Contents >> Built-in Data |
|
Built-in Data Files are used to create entities and to set initial values for stocks, attributes, and constant variables. This input can also be provided with spreadsheet files.
Built-in data files store inputs that are not tied to a specific time: constants (whose values are the same at all times) and initial values (whose values apply at whatever time is designated the start time of the simulation).
Create a new built-in file by expanding the Entity Initialization Data, right-clicking "Data Sources" and choosing "Add Builtin Data". A new file will appear named "Entities 1" in the entity data folder. "Entities 1" is the name of the builtin file, and you may rename it by right-clicking.
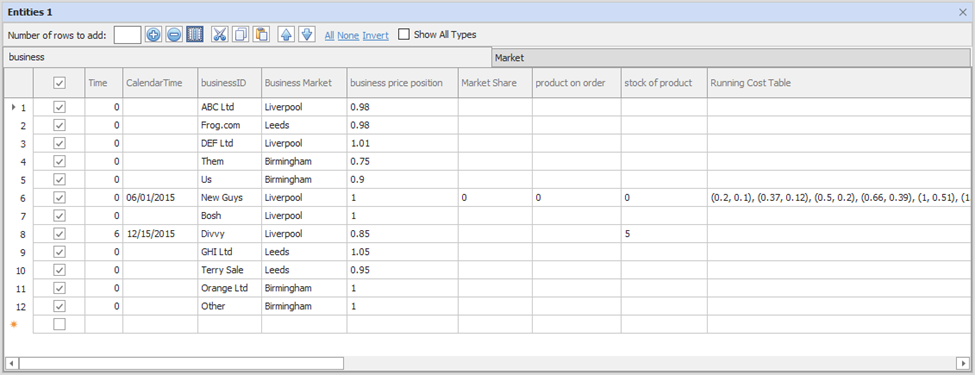
The built-in file will open automatically when created, but to open the built-in data file manually, simply double click it or right click it and select "Edit". A window will appear with a tab for each entity type in your model. Each tab has a column for each required value. On each tab:
•One entity will be created during the simulation for each enabled row. To enable a row, check the checkbox on the left. (Note that for entity types marked as singular, it will not be possible to enable more than the first row.)
•The "Time" column is where you enter the time when the entity will be created during the simulation. If the value is 0, blank, or prior to simulation start, the entity will be active from the start of the simulation (Example). If the model is using calendar time, a date/time format is used.
•The values you type into each column set the initial values for the entity of that row. If you enter no data, Ventity will take the initial value from the stock or attribute's definition.
•You may enter information for entities, and then un-check the row. That entity will not appear in the simulation, but the information will be stored for future use. To include the entity in a future run, simply enable the entity by checking the box.
•To add more rows, simply click the ![]() button. To remove rows, select the rows in question then press the
button. To remove rows, select the rows in question then press the ![]() button. If no rows are selected, the bottom-most row will be removed.
button. If no rows are selected, the bottom-most row will be removed.
•All of the cells in the built-in data can be cut, copied and pasted into, but will only accept valid entries (pasting 1695.03 into calendar time, which accepts mm/dd/yyyy input, won't work).
•Cells can be deselected by hitting the Esc key, or the data within removed by hitting the Delete key. This won't remove the data, just clear it from the selected cell(s).
Once a built-in file has been created, you may use it in multiple Input Data sets: just drag it from one to another in the Model Overview (Example).
If you change a variable name in the model, its name in built-in data files will automatically be kept up to date.
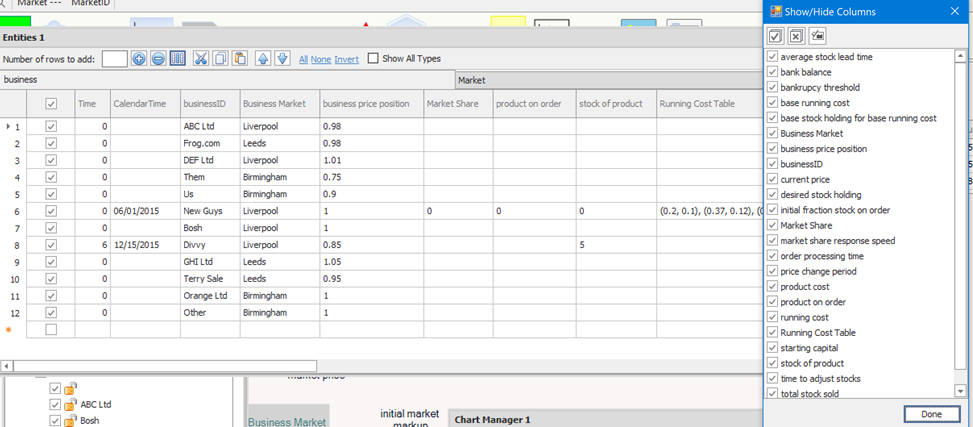
Show/Hide Columns
The Show/Hide columns button brings up a selection dialog that can be used to configure which columns are displayed. Time, Calendar Time, and key attributes are always required. This feature can be used to make it easier to enter and view information for entities with many stocks and constants. In extreme cases, this feature can be used split the initial values between multiple built-in data files and spreadsheets. When the same entity is included as part of multiple inputs, the information is combined.