|
<< Click to Display Table of Contents >> Creating Entity Initialization Data Sets |
  
|
|
<< Click to Display Table of Contents >> Creating Entity Initialization Data Sets |
|
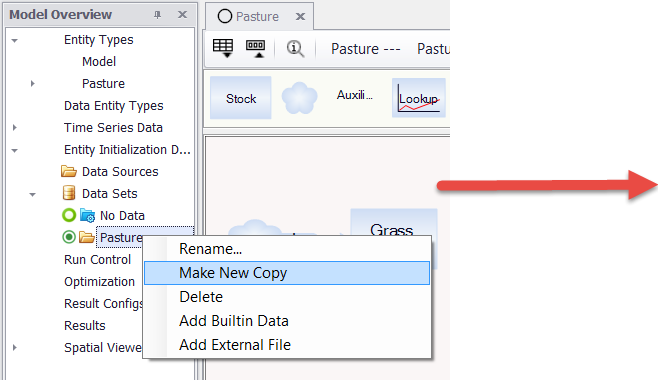
•Expand the Entity Initialization Data tab in the Model Overview. Right-click Data Sets and select "New Input Data Set".

•Or, if you have an existing Input Data set you wish to modify, simply right-click the existing set and choose "Make New Copy". A copy will be created, which you can rename by right-clicking.

Refer to the section on Built-in data.
During initialization, Ventity will apply the values from the first (top) file in the set, then the second, then the third, etc. If the same variable is initialized in two or more files, the last value encountered is the one that will be used during the simulation. This makes it possible to organize a suite of runs by placing a set of standard values at the top of the list, and then for each run, change a smaller set of specific overrides in files toward the bottom of the list.
If a specific entity (identified by a unique key) appears in an input file that did not appear in previous files, that entity will be created. Default values will be used for any initial values not provided.
For additional information on how to effect the order of initialization in specific auxiliaries, see Acive Initial in the Other Functions section