
Vensim Model Import
One of the newer features of our recent releases is the Vensim Model Import tool, and we’d like to take a few moments to walk through some of its uses and some tips for importing models from Vensim to Ventity.
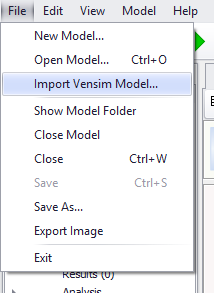
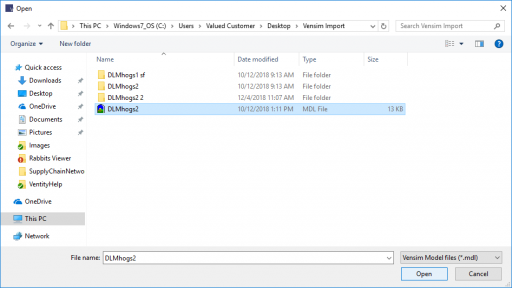
The first thing to keep in mind is that importing a Vensim model can only be done to an empty Ventity model, so Ventity will prompt you to pick a save location for the newly created Ventity model. Once you’ve decided on a location for the new, imported model to be saved, navigate to File and select Import Vensim Model. Navigate to the model you’d like to import, and select Open.
Note that if you’re only interested in importing a portion of a Vensim model into Ventity, you could import the whole model via the Vensim Import tool and then create a single Entity to contain the elements of the Vensim model you’re interested in, then import that Entity into your original Ventity model.
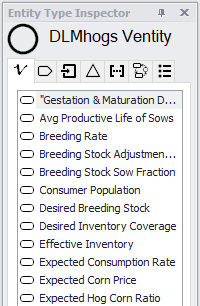
Ventity will automatically add all of the stocks, flows, variables and tables from the Vensim model, and these will all appear on the Entity Inspector of the newly created Entity.
From this inspector, you can then recreate the diagram, starting with the stocks. Once all of the stocks have been placed on the diagram, you can drag the flows on to it; they’ll automatically connect to their relevant stocks.
You can now either manually move the auxiliaries from the Entity Inspector on to the diagram, or you can select the stocks and flows and individually right-click on missing auxiliaries and select “Draw Arrow from [auxiliary name]” to automatically add and connect the auxiliary on the diagram. Once all of the elements of the model are in place, diagnosing any remaining issues should become much easier. For simpler models, it is possible to run Ventity immediately after importing a Vensim model, as even without the diagram set up all of the links, connections and relevant equations still exist. However, since much of the error reporting is tied to elements on the diagram, diagnosing problems becomes much easier with the diagram fully (or even partially) built prior to running the model.