|
<< Click to Display Table of Contents >> Create a New Model |
  
|
|
<< Click to Display Table of Contents >> Create a New Model |
|
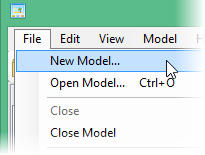
Create a new model by choosing "New Model" from the File menu
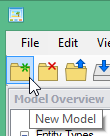
or the toolbar
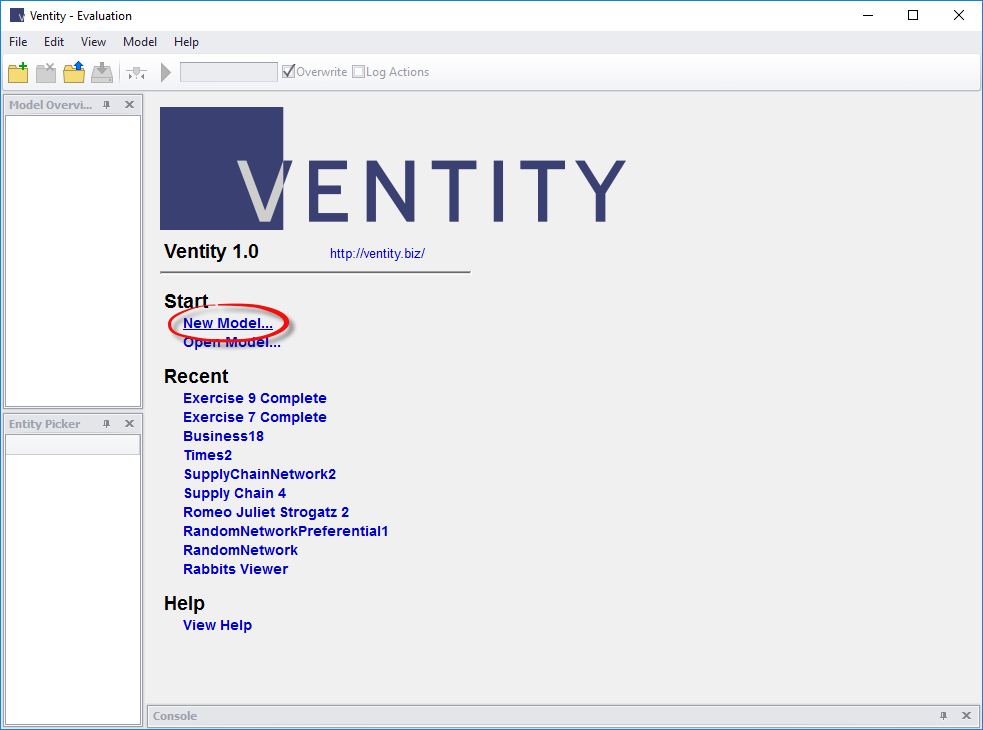
or the home screen (Example).
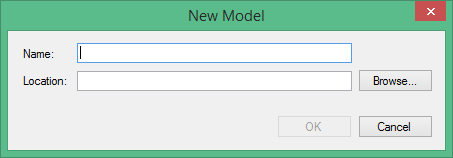
Choose a name for your model and location to store the model folder.
Your model now exists, and so far consists of exactly two entity types. You can see these listed under Entity Types in the Model Overview panel on the right.
One has the name "Model". The Model entity is for information about the machinery of the simulation, such as the starting time of the simulation, the final time, and the time step.
The second entity type is the default entity type, and has the same name as whatever name you gave to your model. You can see its properties in its inspector window on the left, and it has a main diagram (currently empty) in the middle.
There are at least two ways to use the default entity type:
1.Think of it as the environment.
The default entity type can be used to represent the environment in which your entities will exist and interact. If your model is about competing species of aquatic weeds, the default entity type might represent the lake, holding information about the lake dimensions and water temperature. If you are modeling the adoption of a new bicycle design, the default entity type might represent the market, and hold information about the population, general economic indicators, and transportation statistics. If you choose to use the default entity this way, you might elect to make it a singular entity, discussed further in the Properties section below.
2. Ignore it. You can even delete it.
If the first use does not apply to you, you don't need to keep the default entity type. In the Model Overview panel, right-click on the default entity type and choose "delete". You can always create a new one later on.
You are now ready for the next step: defining the types of entities to simulate.
The Vensim Model Import tool was created to aid in recreating or reusing the work of a Vensim model as a basis for a Ventity model. While many simpler models can be imported and will run correctly immediately, others, especially those that utilize arrays and/or subscripts will need additional work to run.
To utilize the Vensim Model Import, simply open Ventity and select "File" at the top-left of the screen, then select "Import Vensim Model". Navigate to the Vensim .mdl file you'd like to import, and click "Open". Ventity will automatically add all of the stocks, flows and auxiliaries into the Ventity model, and you'll be able to see them propagating in your Model Overview or Entity Inspector. To recreate the model from the Inspector without running into errors, begin by placing the model's stocks, then flows, and finally move on to auxiliaries on the host entities before going on to ghosts.
Note that Ventity will only allow you to import a Vensim model into a new Ventity model. You cannot import a Vensim model into an already existing Ventity one, but can transfer parts of any Ventity model to any other. For more information on how, see Import Entity Types.