|
<< Click to Display Table of Contents >> Save Lists |
  
|
|
<< Click to Display Table of Contents >> Save Lists |
|
Save Lists are used to reduce the size of model output files to include only outputs that are needed for analysis or validation. Using a Save List does not affect the values of any of the variables that are saved. Use of a Save List may improve execution time on large models. Save Lists should almost always be used with Sensitivity Analysis, especially for larger models.
To define a save list, simply navigate to the Model Overview pane, right-click "save lists" and select "New Save List". This will automatically create a new Save List named "Save List1" under the save list tab. By either double-clicking or right-clicking and selecting "Edit", you'll see a display that includes every variable in your model broken down by entity, pictured below.
The first section of the Save List dialog lets you save less detail in terms of time intervals. If the box is checked, only intervals that align with the Save Step will be saved in the output. (all time steps are calculated to insure the final numbers are the same regardless of Save Step)
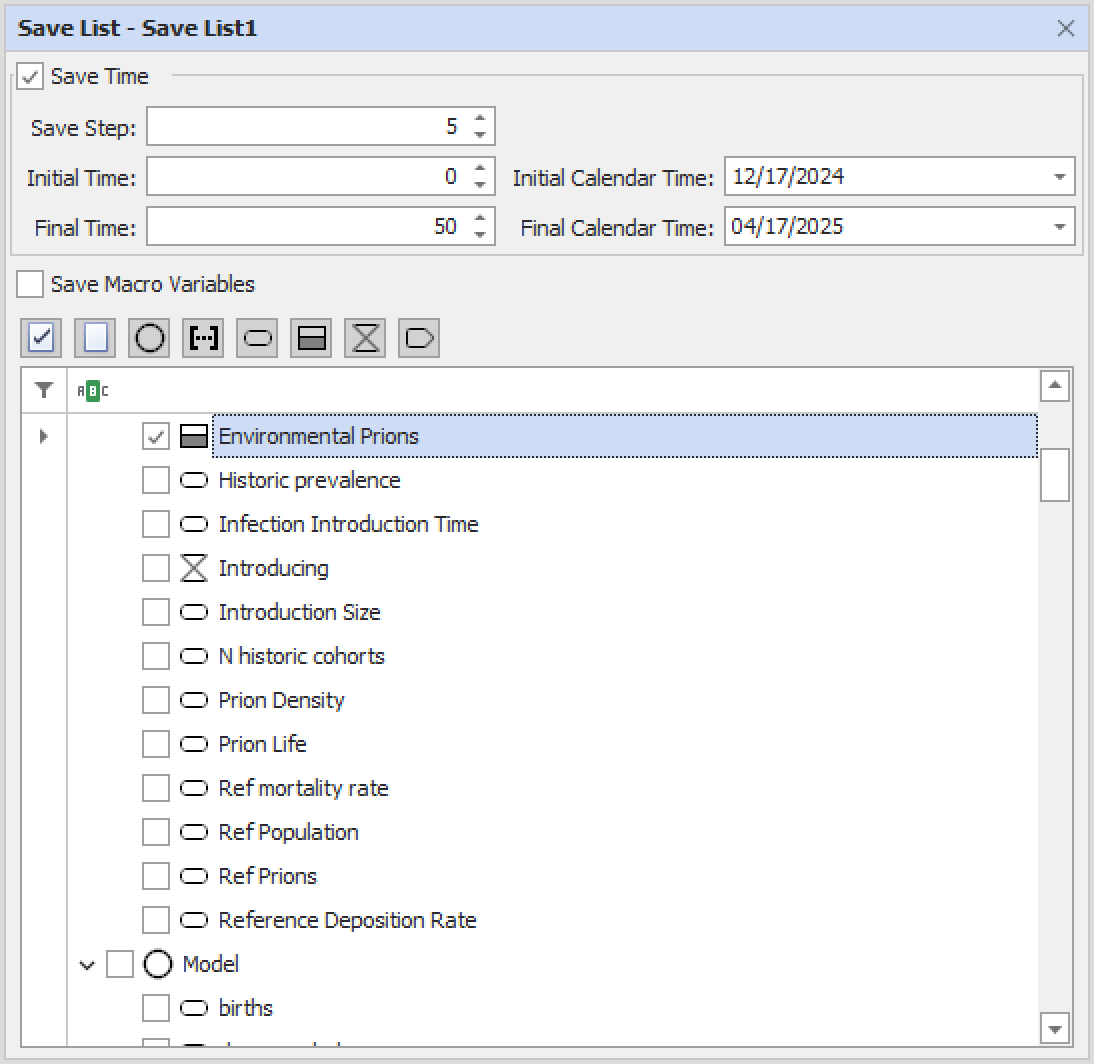
Variable Selection:
Selecting the check box next to an entity name to select all of its variables. If you want to select individual variables in an entity, simply click the check box next to each variable.
You can also sort all of the variables by type (stock, flow, etc.) by clicking the relevant icons at the top of the save list.
Save Lists are selected in the Run Control table.
Similar to Save Lists, Save Period allows you to select a range of dates or times that are of particular interest to you and only save the results or changes that occur in the Sensitivity run within that time frame, or at certain time intervals. This will dramatically increase the speed and performance of the run, especially in larger Sensitivity runs. Changing the Save Period for a run will not effect the results of the run, it will simply change how much of the data is available to be seen and manipulated during and after the run has completed.
To adjust the Save Period, navigate to the Model Overview tab and right-click or double click on Run Control. On the far right of the newly opened Run Control there will be options for Save Time Step (1), Initial Save Time (2), Final Save Time (3), Initial Save Calender Time (4), and Final Save Calendar Time (5).
To set the Save Period you can either set a Save Time Step, which will determine how often Ventity saves and presents the information from the run to you, or the Save Times, with initial time in both cases relating to the time you've already set in Initial and Final times in your run control, or Calendar Times meaning the same but for Calendar time. Note that these settings will default to match those in the rest of your Run Control, meaning you'll save all of the data throughout the model run.